Text Posts
Learn how to create and schedule simple text posts with Chronosky.
Overview
Text posts are the most basic type of scheduled post in Chronosky. You can write up to 300 characters (Bluesky's limit) and schedule them to be published at a specific time.
Creating a Text Post
Step 1: Access the New Post Form
From your dashboard, click the "New Post" button located in the top right corner.
TIP
Location The "New Post" button is always visible in the header, regardless of which page you're on.
Step 2: Enter Your Post Content
In the post creation form, you'll see a large text area where you can write your content.
UI Elements:
- Text Area - The main input field for your post content
- Character Counter - Shows
X / 300to track your remaining characters - Format Toolbar - Quick access to formatting options (optional)
Example Post:
Hello Bluesky! 🦋

I'm trying out Chronosky for scheduled posting. This is my first automated post!

#Bluesky #Automation
INFO
Character Limit Bluesky posts have a maximum length of 300 characters. Chronosky displays a red warning when you exceed this limit.
Step 3: Select Schedule Time
Below the text area, you'll find the date and time picker.
How to Set the Schedule:
Click the Date Field
- Opens a calendar picker
- Select your desired date
- Today and past dates are disabled
Click the Time Field
- Opens a time picker
- Select hours and minutes
- Supports 24-hour format
- Minimum: 5 minutes from now
Time Zone Display
- Browser's timezone is selected by default, but you can manually search and select a different timezone from the dropdown combobox when creating or editing a post.
WARNING
Minimum Schedule Time Posts must be scheduled at least 5 minutes in the future. This ensures proper processing by the scheduler.
Step 4: Review and Schedule
Before scheduling, review your post:
Pre-flight Checklist:
- ✅ Post content is correct
- ✅ Character count is within 300
- ✅ Schedule time is at least 5 minutes away
- ✅ Timezone is correct
Click the "Schedule Post" button to create your scheduled post.
Post Status Flow
After scheduling, your post goes through several states:
Status Meanings
| Status | Description |
|---|---|
| Pending | Waiting for scheduled time |
| Processing | Being published to Bluesky |
| Published | Successfully posted |
| Failed | Error occurred (can retry) |
Managing Your Posts
View Scheduled Posts
Navigate to your dashboard to see all scheduled posts:
- Pending Tab - Posts awaiting publication
- Published Tab - Successfully posted
- Failed Tab - Posts that encountered errors
Note: You can switch between a "List view" and a "Calendar view" to manage your schedule.
View Post Preview
To see how your post will appear on Bluesky before it's published:
- Find the post in the "Pending" tab
- Click on the post content area to open the preview modal
- Review how your post will look on Bluesky
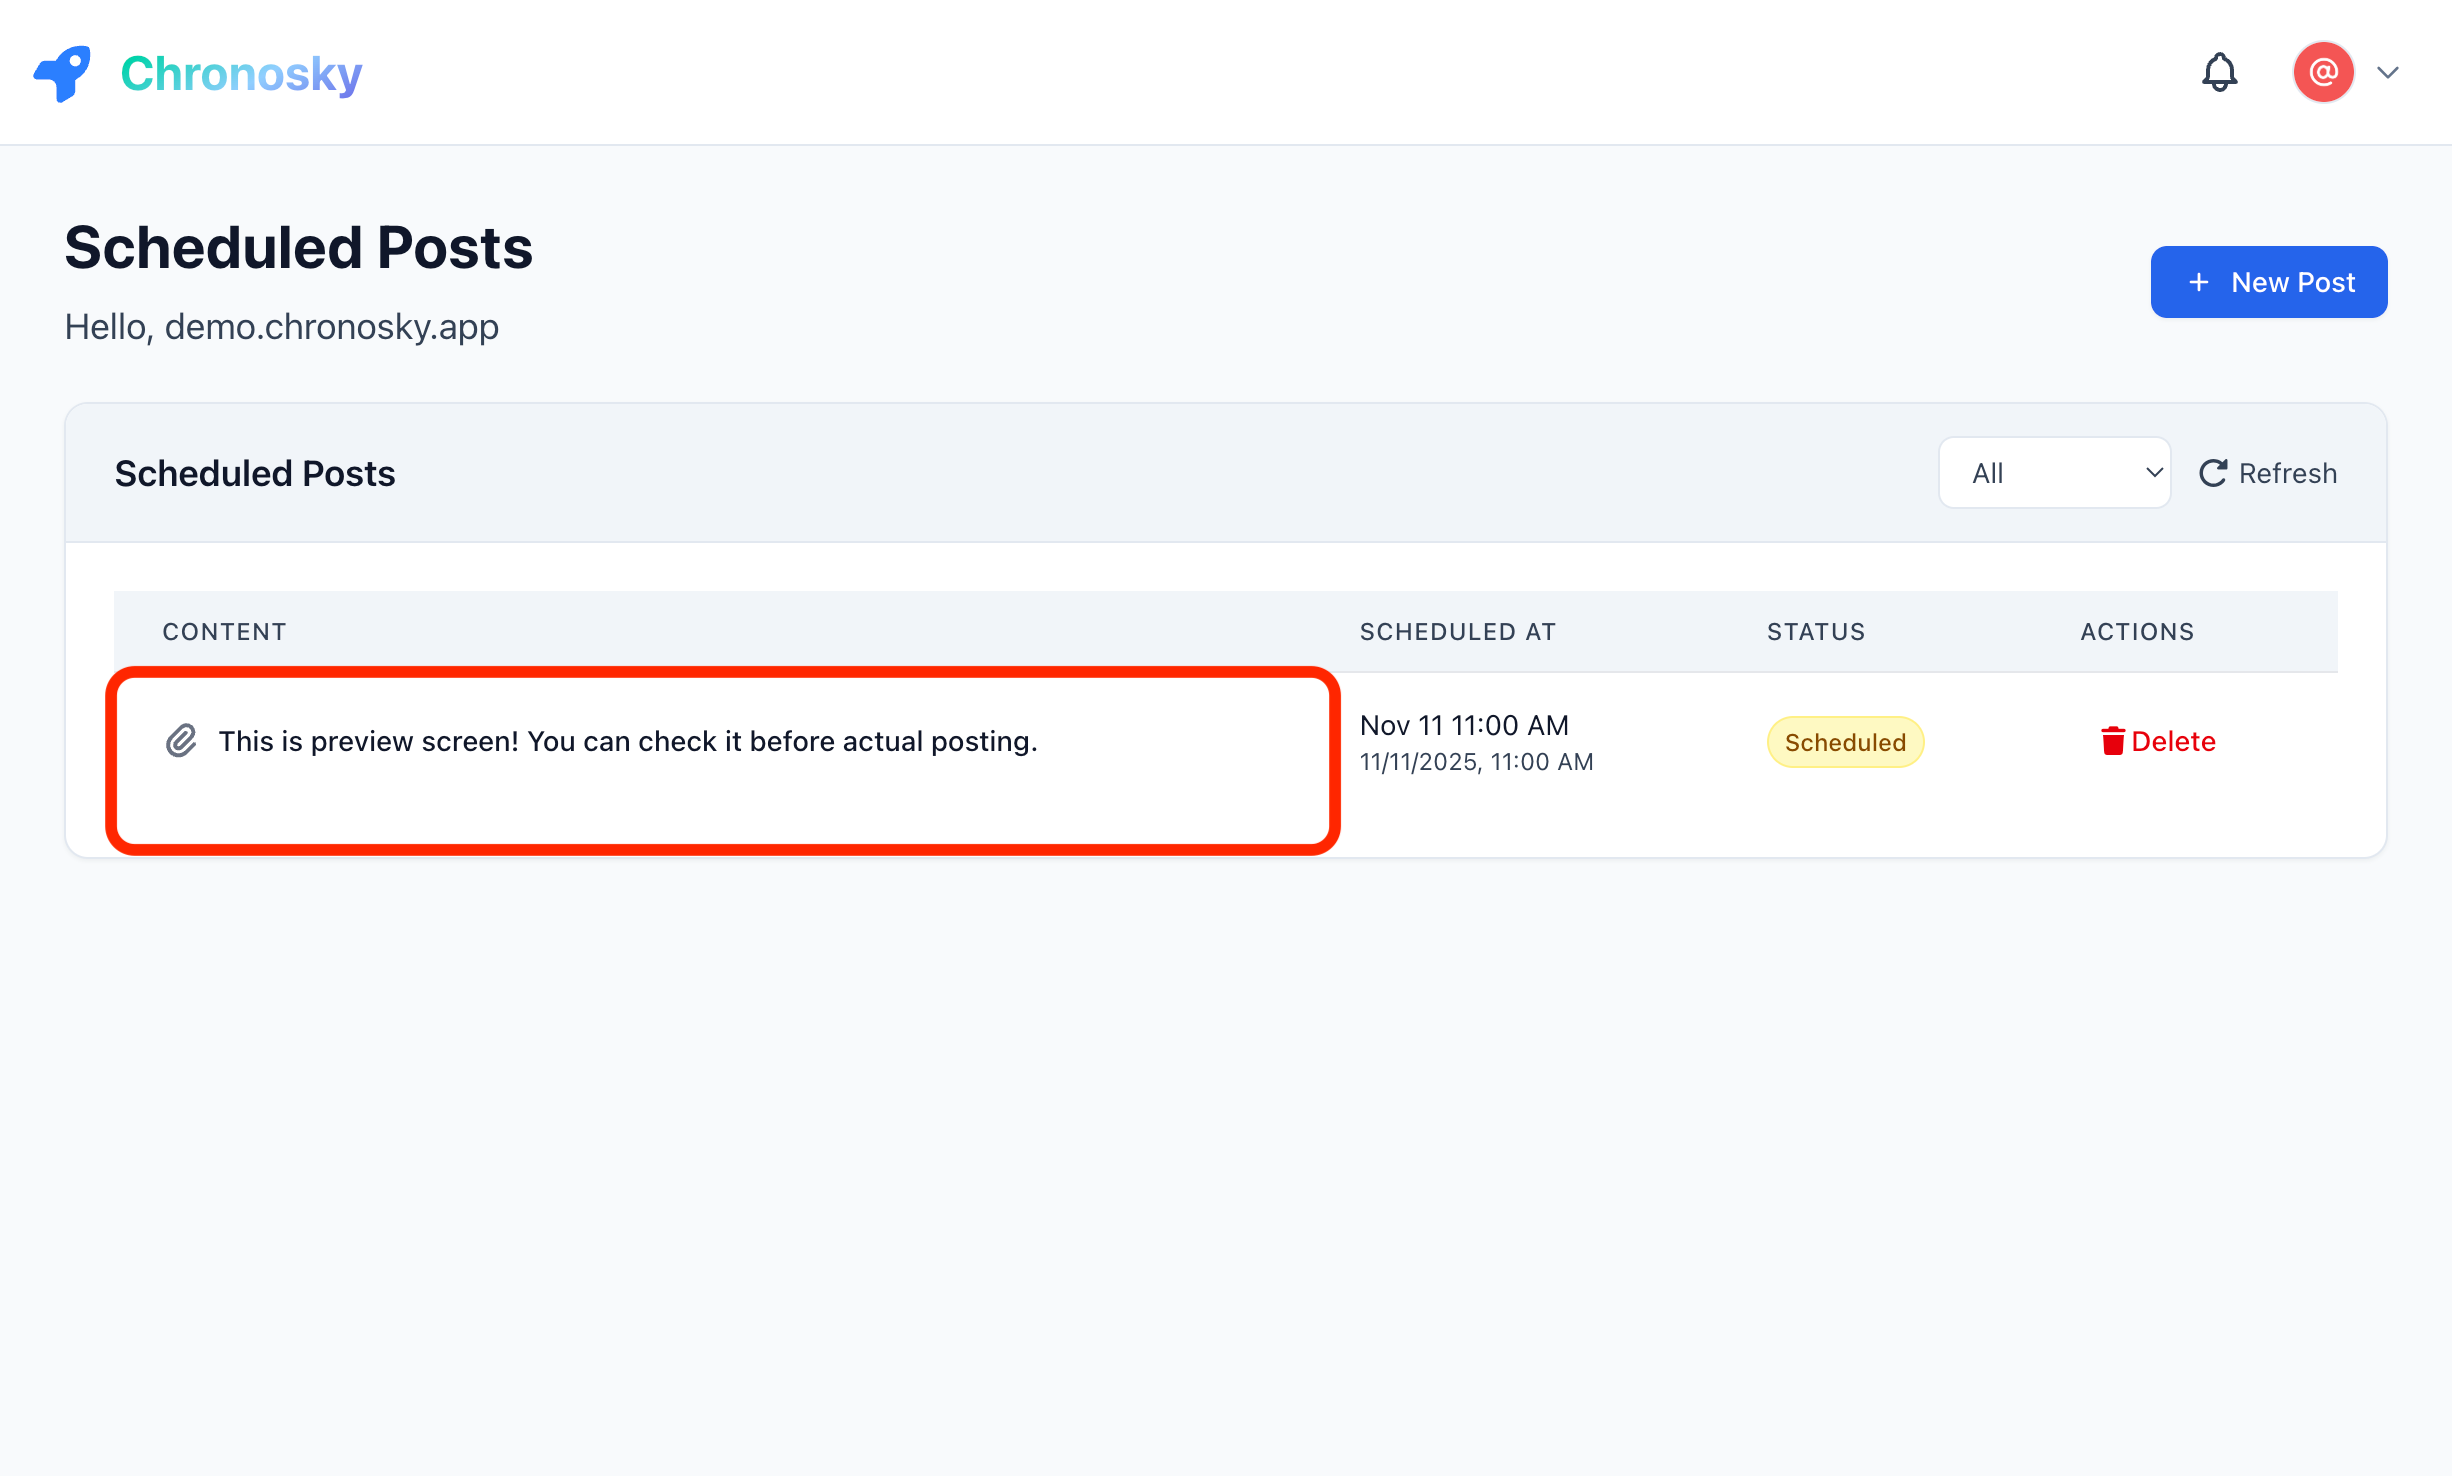 Click anywhere on the post content to open the preview modal
Preview Modal Features:
- Bluesky-style rendering - See exactly how your post will look
- Character count - Verify you're within the 300 character limit
- Link previews - View how link cards will appear
- Image previews - Check image layout and quality
- Thread preview - For thread posts, see all posts in sequence
- Scheduled time - Confirm when the post will be published
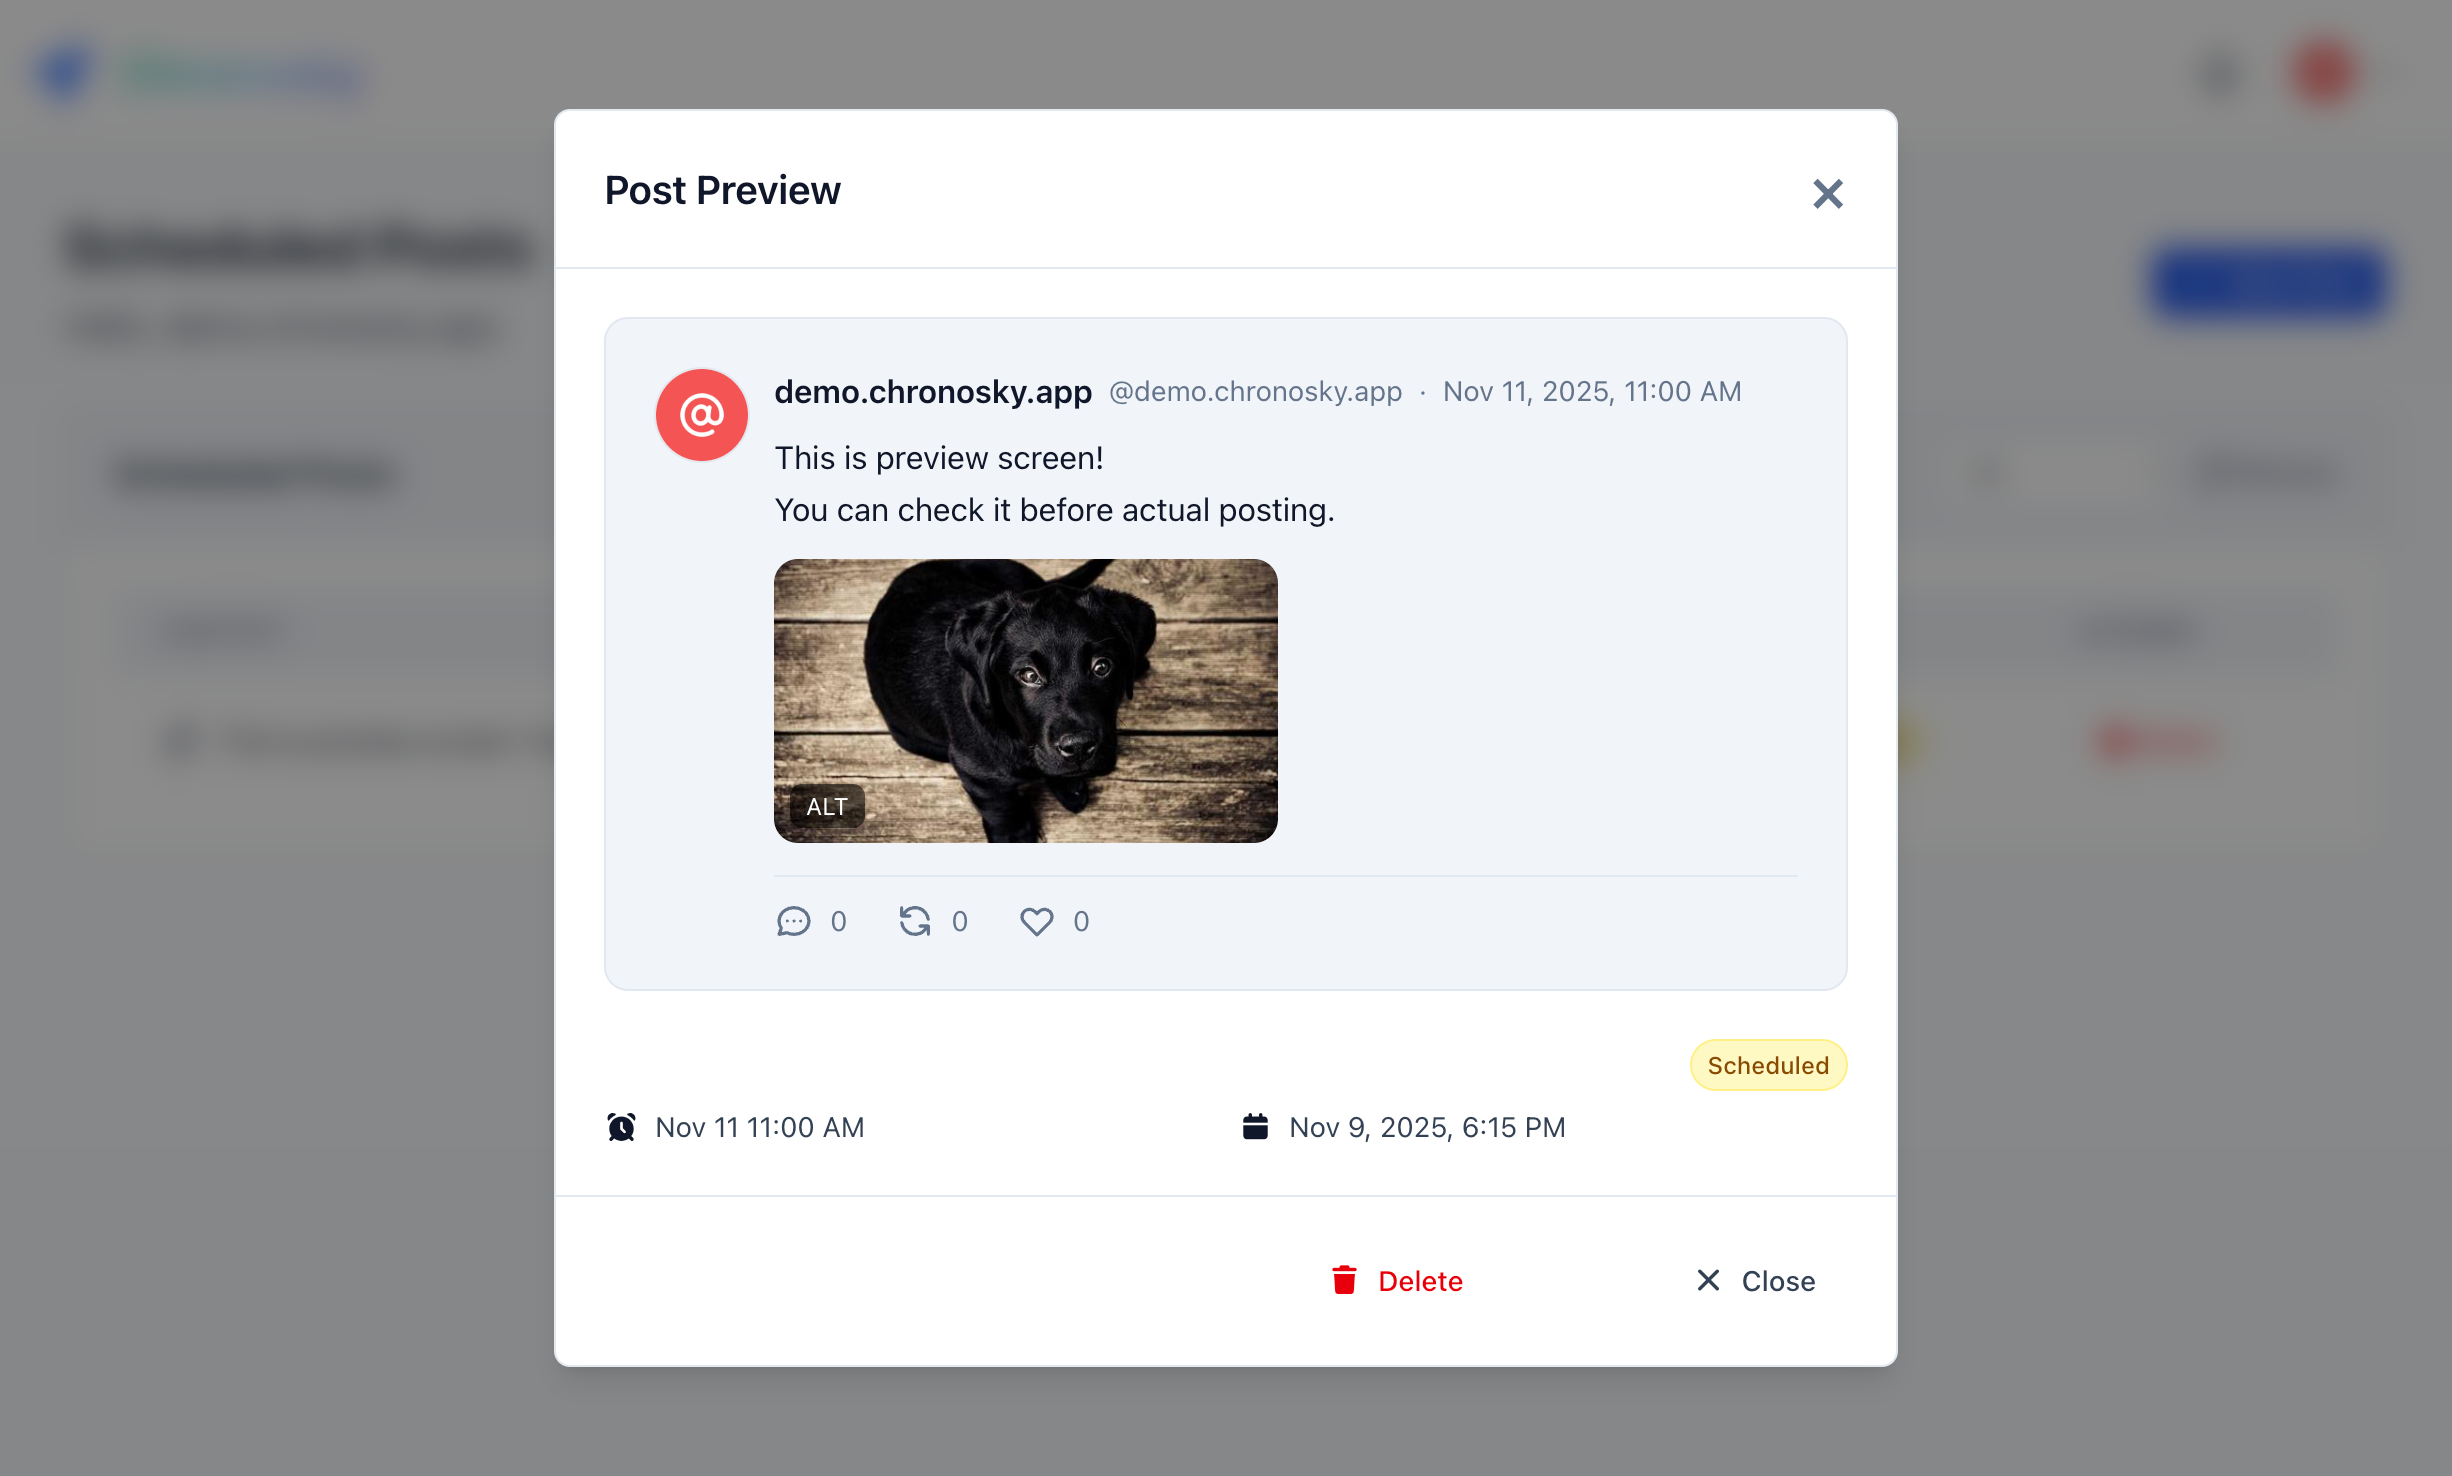 The preview modal shows your post exactly as it will appear on Bluesky
TIP
Preview Accuracy The preview uses Bluesky's official rendering engine, so what you see is exactly what will be published.
Edit a Pending Post
You can edit posts that haven't been published yet:
- Find the post in the "Pending" tab
- Click the post content to open the preview modal
- Click the "Edit" button in the modal footer
- Make your changes in the edit form
- Click "Save Changes" to update the post
Editable Fields:
- Post content (text, hashtags, mentions)
- Scheduled date and time
- Images (add, remove, or reorder)
- Link cards (change URL or remove)
- Thread structure (for thread posts)
WARNING
Edit Restrictions You cannot edit posts that are within 2 minutes of their scheduled time or posts that have already been published.
Delete a Post
To remove a scheduled post:
- Click the post card
- Click the "Delete" button (usually red)
- Confirm the deletion in the dialog
DANGER
Deletion is Permanent Deleted posts cannot be recovered. Make sure you want to delete before confirming.
Special Features
Hashtags
Chronosky automatically detects hashtags in your post:
Check out this amazing #sunset photo! #Photography #NatureHashtag Rules:
- Start with
# - No spaces (use camelCase for multi-word:
#BlueskyTips) - Can include letters, numbers, and underscores
- Maximum 8 hashtags per post (recommended)
Mentions
Mention other Bluesky users with @:
Thanks @username.bsky.social for the inspiration!Mention Format:
- Use full handle:
@username.bsky.social - Or custom domain:
@yourname.com - Chronosky validates handles before scheduling
URLs
You can include URLs in your text posts:
Check out my blog: https://example.com/blog-postURL Behavior:
- Automatically detected and counted
- Detected URLs appear as buttons below the text area. Click a URL button to select it and generate a link preview card. (see Link Cards Guide)
- Shortened URLs work fine
- HTTPS recommended
Text Links
Use [text](URL) format to embed URLs with custom link text.
Method 1: Type in Markdown format:
Type directly in the text area:
Check out the [blog post](https://example.com/blog) for more details.Method 2: Paste URL over selected text:
Select text in the text area, then paste a URL (starting with https://) using Cmd+V (Mac) / Ctrl+V (Windows). The selected text is automatically converted to [selected text](URL) format.
TIP
Text Links and Link Cards
URLs in text links are also detected as link card candidates. Click the URL button below the text area to generate a link preview card.
Troubleshooting
Common Issues
Post Not Publishing
Symptoms:
- Post stays in "Pending" status past scheduled time
- No error message shown
Solutions:
Check Scheduler Authorization
- Go to Settings → Scheduler
- Verify "Active" status
- Re-authorize if expired
Verify Time Zone
- Settings → Language & Timezone
- Ensure correct timezone is set
Check Scheduler Status
- Dashboard → System Status indicator
- Green = operational, Red = issues
Character Count Mismatch
Symptoms:
- Post appears under 300 chars but shows error
- Unicode characters counting as multiple
Explanation: Some characters (emojis, certain languages) may count as multiple characters in Bluesky's system.
Solutions:
- Use the built-in character counter
- Test with fewer emojis
- Simplify text formatting
Failed to Schedule Error
Symptoms:
- "Failed to schedule post" error message
- Post doesn't appear in dashboard
Common Causes:
- Network connectivity issue
- Server temporarily unavailable
- Browser session expired
Solutions:
Refresh the Page
- Reload browser
- Sign in again if needed
Check Network Connection
- Ensure stable internet
- Try different network if possible
Clear Browser Cache
- Clear cookies and cache
- Sign in again
Contact Support
- If issue persists
- Report on GitHub Issues
Best Practices
Content Planning
Draft Offline
- Write posts in a text editor
- Review before scheduling
- Save drafts for future use
Timing Strategy
- Schedule during peak activity hours
- Spread posts throughout the day
- Avoid scheduling too many at once
Content Variety
- Mix different types of content
- Use hashtags strategically
- Engage with mentions
Scheduling Tips
Buffer Time
- Schedule 10+ minutes ahead
- Account for timezone differences
- Leave room for last-minute edits
Batch Scheduling
- Schedule multiple posts at once
- Plan content calendar weekly
- Use consistent timing
Monitor Results
- Check published posts regularly
- Track engagement patterns
- Adjust schedule based on data
Keyboard Shortcuts
Speed up your workflow with these shortcuts:
| Shortcut | Action |
|---|---|
Ctrl + Enter (Windows) | Schedule post |
Cmd + Enter (Mac) | Schedule post |
Ctrl + S | Save draft |
Esc | Cancel/Close form |
Next Steps
Now that you know how to create text posts, explore more features:
- Thread Posts - Create multi-post threads
- Images - Add images to your posts
- Link Cards - Share links with previews
FAQ
Q: Can I schedule the same post multiple times?
A: Yes, you can duplicate a post by clicking "Duplicate" in the post details.
Q: What happens if I delete a post after it's published?
A: It will be removed from your Chronosky dashboard, but will remain on Bluesky. Delete directly on Bluesky if needed.
Q: Can I schedule posts to multiple Bluesky accounts?
A: Currently, Chronosky supports one account per user. Use separate accounts for multiple profiles.